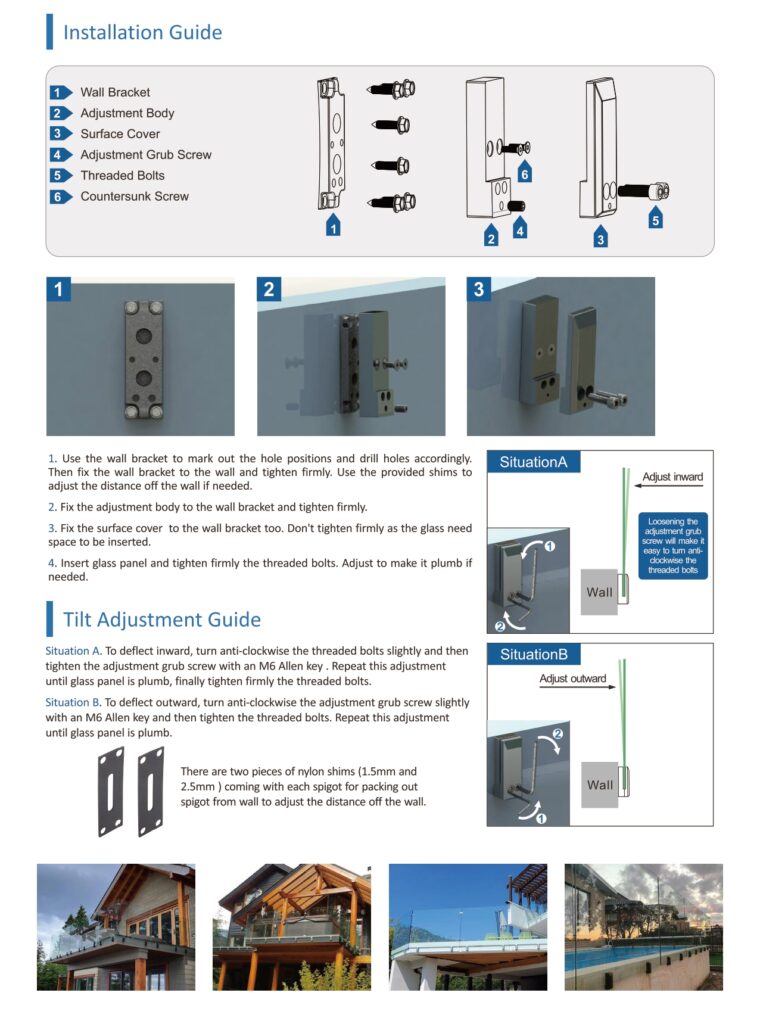
Glass Railing Installation Guide
Glass Railing Installation Guide
Welcome to our installation guide for DIY Wholesale Glass Railing products! This guide provides comprehensive instructions and useful tips that will help ensure a successful installation.
For any questions or additional support, please contact us - we're always here to help!


Before you begin...
1. Inspect Your Packages: Check all packages for shipping damage and confirm that everything matches the packing list. If any damaged or missing parts are found, please contact our customer support within 3 business days of delivery.
2. Building Code: Ensure compliance with local building codes. We are not responsible for code compliance and will not accept returns for non-compliance.
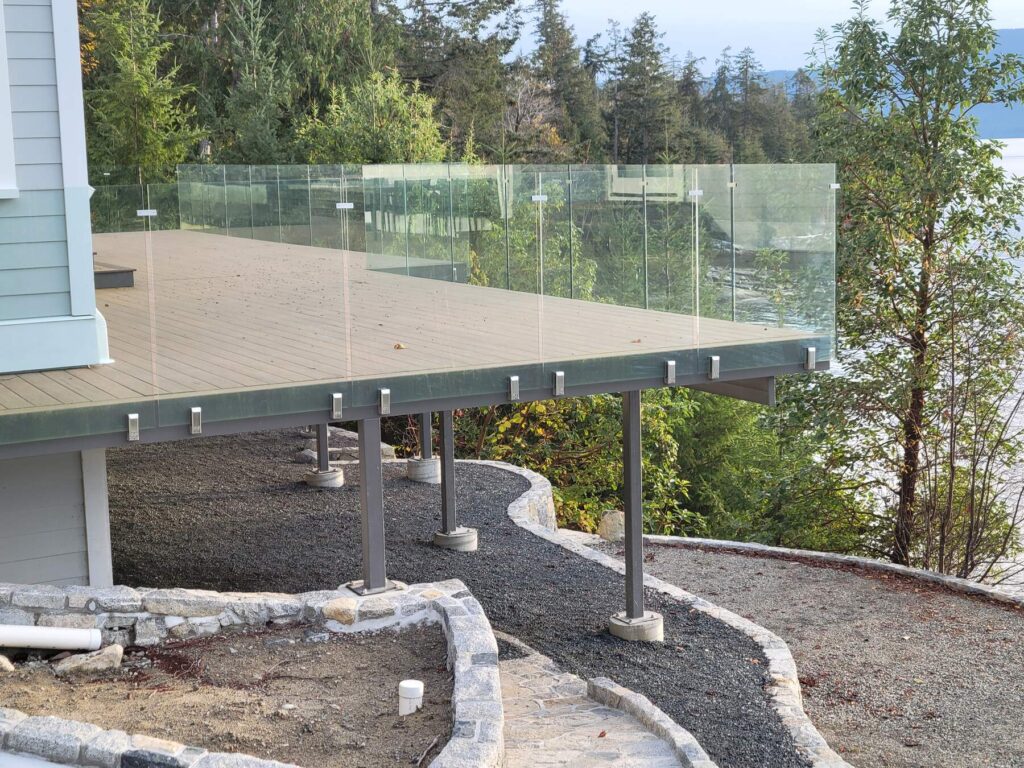
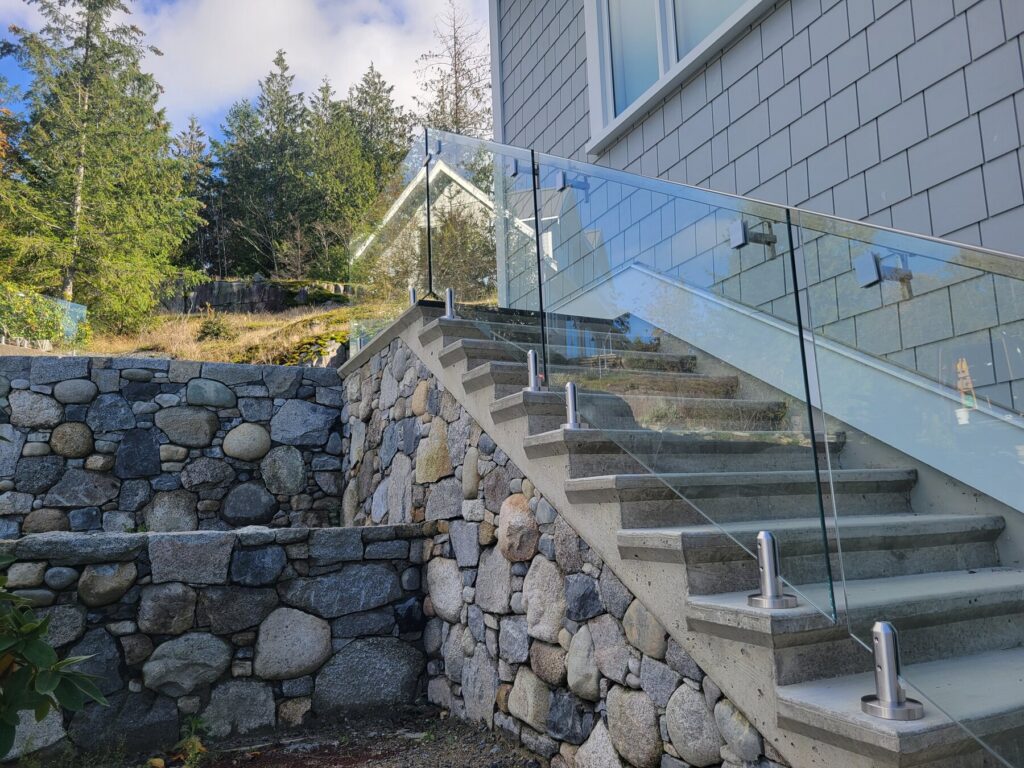
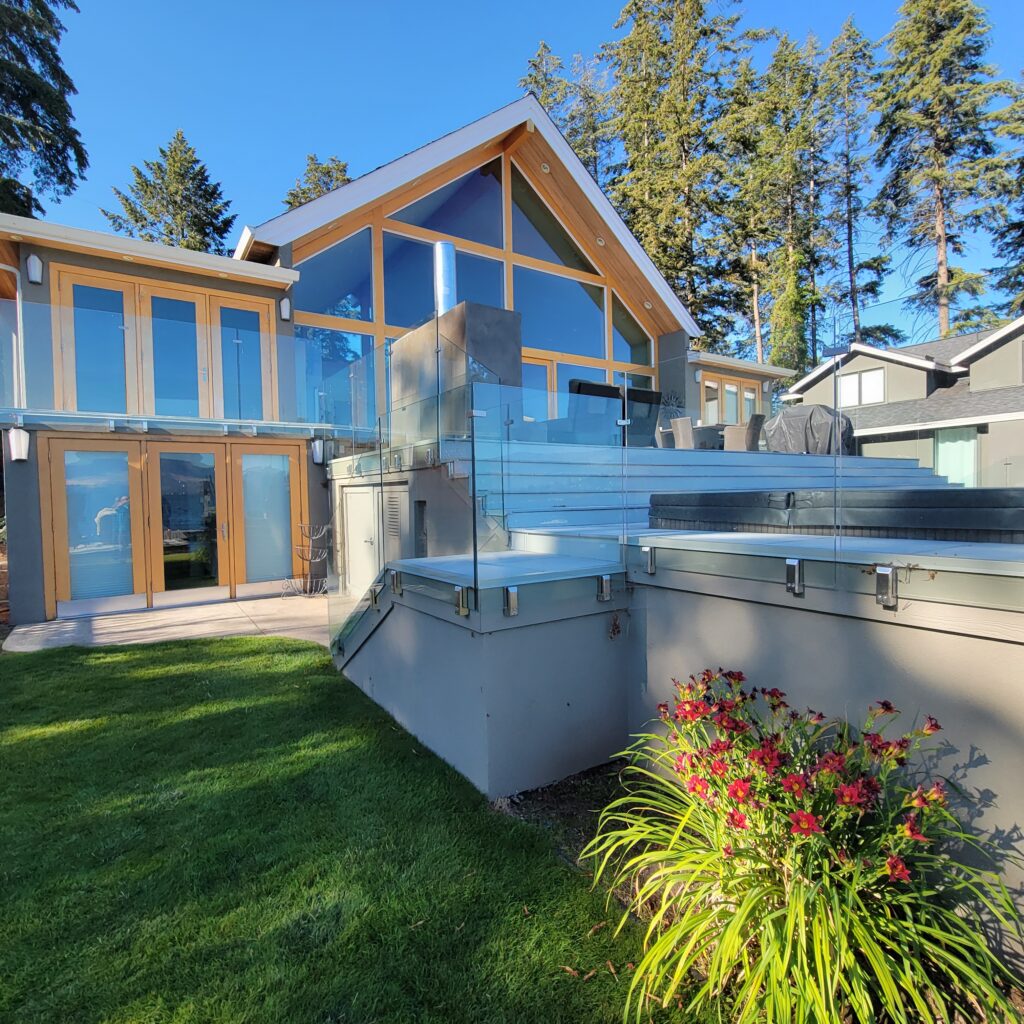
3. Handling Glass Panels: Due to the weight and nature of glass panels, we recommend lifting with two people. Avoid letting glass edges contact hard surfaces such as concrete.
4. Safety Gear: Wear safety glasses, safety boots, work gloves, and other appropriate safety gear when handling glass and using power tools.
5. Tools: Prepare all of the tools that you will need for installation: measuring tape, level, pencil, power drill with 1/8" and 5/16" Drill Bits, allen key
Installation Steps
1. Mark the Railing Centerline: Use a string line or chalk line to mark the railing centerline across the entire installation area. For multiple sections, mark the centerlines of each span.
2. Mark the Glass Panels Position: Refer to your plan to identify each glass panel position. Mark the starting and finishing points of each glass panel along the railing centerline, ensuring proper gaps between panels.
3. Mark the Spigots Position: Measure 8” from the glass panel starting and finishing points, and mark the spigot centers. For door spacing, refer to the door installation step.
4. Install the Spigots: Place the spigot on top of the 1/8” thick metal base plate, aligning it with the railing centerline and respective reference marks. Mark the 4 anchor points, pre-drill holes, secure the spigot with lag head screws, level it using the Allen key adjustment screws, and tighten the screws firmly. Repeat for each spigot.
5. Install the Glass Panels: Align the glass panel with your marks from step 2. Secure the glass panel into the spigot by tightening the Allen key screws. Set all glass panels along the span, ensuring they are flush and properly aligned.
6. Adjust the Glass Panels: Adjust the glass panels until they are level and have proper gaps all around. Loosen Allen key screws if needed, use setting blocks for adjustments, and tighten the screws once the glass is aligned.
7. Install Glass-to-Glass Clamps: Loosen the Allen key screws, slide the clamp into place, set it at the desired height (recommended 2 1/4’’ from the top of the glass), and manually tighten the inner face of the clamps.
8. Door Installation (Inline Configuration): For an inline configuration, ensure the door opening is 36”. Install two spring-loaded door hinges and a magnetic door latch. Adjust the door closing speed with Allen key screws on the hinges. For pool railing, the door latch should be on the pool side, with the door swinging outward.
9. Door Installation (Corner Door Configuration - Wall/Post to Glass): Ensure the door opening is 36”. Install two spring-loaded door hinges and a magnetic door latch. Adjust the door closing speed with Allen key screws on the hinges. For pool railing, the door latch should be on the pool side, with the door swinging outward.
10. Door Installation (Corner Door Configuration - Glass to Glass): Ensure the door opening is 36”. Install two spring-loaded door hinges and a magnetic door latch. Adjust the door closing speed with Allen key screws on the hinges. For pool railing, the door latch should be on the pool side, with the door swinging outward.
11. Door Lock Installation: Install the door lock on the exterior (non-pool) side using an Allen key. Close the door and mark the lock’s cylinder center. Drill a 5/8’’ diameter hole 3/8’’ deep on the mark.

Tips and Final Adjustments
- Make sure all spigots are properly aligned along the centerline, and that they are plumb and level.
- Use setting blocks to make precise adjustments.
- Align the top edges of the glass panels using glass-to-glass clamps.
- Continuously check the level and alignment throughout the installation process.
Congratulations on completing your frameless glass railing installation! We'd love to see the final result—feel free to snap a few photos and send them our way. Thank you for choosing DIY Wholesale Glass Railings for your project!
Smart Spigot Installation Videos
Additional Installation Guides
12 Inch Spigot:
12 Inch Spigot
Side Mount Smart Spigot:
Side Mount Smart Spigot